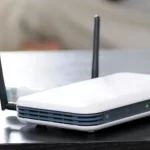
A private file sharing home network is where all your computer devices are connected via Network Address Translation (NAT). In this private network, you can connect all your devices that are on a similar physical network. With setting up your private home network, you can share printers and files restricting the internet. In this article, I’ll discuss how to create a private file-sharing home network.
Steps to create private file sharing home network:
- Gather the required devices and environment setup ready. Buy an installation CD which you will need. Network drivers may be required depending on the version of your computer. Then you have to decide what will be the name of your home network. It could be a family name or anything easy to remember. Now note down the device names for each computer. Keep the files ready to be sharing.
- Decide how you want to connect the computers to a home network. You can buy ethernet drivers or any wireless solution for connecting the computers to share files.
- Now install the NICs (Network Interface Cards) into the proper slots of the computers. You require either wireless or ethernet NICs, depending on whichever connection you have chosen.
- Buy long ethernet cable. If you want to connect the computers via ethernet, make sure that you buy ethernet cables large enough to connect all computers and other necessary devices to the line. Ethernet cable comes in different lengths, and you should measure how much you need to afford all the devices to be connected. Buy according to your need.
- Connect the computers to your home network. Connect 2 computers via RJ-45 crossover wire. Connect more than 2 computers to your home network using a switch or hub. If you are connecting 3 or more computers to your home network, make sure that the hub has enough ports to support all computer connectivity. Hub comes with several port configurations. So purchase one according to your need.
- Set up your home network connection. Now you need to follow the manual and go through the instruction set. They mention all the processes from installing to setting up the network step by step in detail.
- Get the drivers for network connectivity. Firstly install the required network driver software. This step is mandatory for both wireless and ethernet network connections. The software should be able to drive your wireless or ethernet connection. Now follow the instructions available as setup guidance from the installed driver. Decide which computer will serve as host and which computers will be shared nodes.
- Configure the drivers for the home network. Firstly reboot the computer after installing the driver software. Then set up your profile on the driver for both wireless and ethernet connectivity. Run the network configuration program to set up your profile and follow the instructions carefully.
- Set the mode to peer-to-peer or ad hoc or use access point. Select the mode to either peer-to-peer or ad hoc in case you don’t have an access point. But if you want to use an access point, then you need to configure the infrastructure. Start by entering the name of your home network. If you have chosen ad hoc, then all the adaptors should be linked to the same channel on the home network. Change the settings from 1 to 11 for the channel. If you are using an access point, the client computers will automatically set up their environment and choose the best connectivity channel. Finish the process by entering the correct encryption code following the vendor manual.
- Buy a fast router for your wireless or wired ethernet connectivity. It is a simple step. Just put the adaptor end to your device’s USB plugin and connect the other end to the electrical plug.
- Setting up the ICS (Internet Connection Sharing). Connect the host computer to the internet and share the internet via the router to all the client nodes. Thus your home network will be private. Connect the computer to the internet using high-speed dial-up network connectivity. Connect an ethernet card to the host computer, which will share the internet. Connect the bridge cable to the ethernet port on the router or directly to the second ethernet card (if you don’t have a second router) and connect the bridge to the power supply.
- Install the ICS and CD software. Install the ICS in the host computer and CD software to the client computers. Now get a network configuration program. Type the same password as you entered for the bridge. Repeat this step for each computer that you wanna connect to the home network. Connect the adaptor to the computers’ USB port and install the drivers from installing the CD software. You need to put the same password as the bridge and do it for all computers connected to the network.
- To ensure the settings’ completion, reboot your computers, and you’re ready for private file sharing on your home network.


